New Look, New Name, Same Blog!

...formally known as Bizzy Bee Creations...and then Bucket of Cherries...now Sweet Stamps. Hopefully this name will stick!
Showing posts with label kids activities. Show all posts

Nov 11, 2010

Upside Down

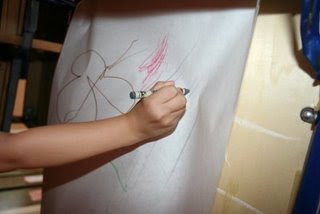
Kelly had fun coloring under the table!!

Window Painting!

I found the best recipe for window paint
It is super easy to make...
water, corn starch, dish soap and food color
I ended up just mixing a little of each until
I had the consistency of pudding.
Not only was it FUN but it was super
easy to clean up and my window is now spotless!!!


Rock Painting!

This was a great boredom buster for Kelly!
She chose a bunch of rocks from our rose garden and painted them! Washing off her collection

Some of them are "animals" of some sort!
FUN and super easy project!

Paper Mache!

Paper Mache Bowls!
I found this cute idea at Kids Craft Weekly
So simple and easy.

Here is what you need:
colored tissue paper, Elmers glue, paintbrush,
plastic bowl and saran wrap

1. Cover the bottom of a plastic bowl with saran wrap...
I taped it to the inside of the bowl so it would not move or slide

2. In a separate bowl mix together
equal amounts of glue and water
I used 2 bottles of Elmers glue for 5 bowls

3. Tear tissue paper into pieces (size does not matter!)
I used 3 sheets for 2 bowls...next time
I will probably use 3-4 sheet per bowl

4. Paint a layer of glue mixture onto bowl. Cover with tissue paper and more glue.
Continue until you have used all the tissue paper.

5. Lay it outside to dry. Once you think the outside of the bowl is dry enough,
carefully pull it away from the plastic bowl and then gently pull off saran wrap.
Leave out for another hour or more so the inside can continue to dry.


A few things I learned for next time...
*wrap the bowls in saran wrap before. This was a "boring"
part for Kelly and she really could not help with this step.
*Tear some of the paper before as well. Took longer than
I thought and was too much for a 5 year old attention span.
However, let them do some of the tearing...
it is great for their fine motors!
*Only use plastic bowls! We used a few glass bowls and
the tissue did not slide off easy...I ended up tearing 2 bowls :(
*Use more tissue paper! More paper = thicker/sturdier bowl

Have fun!

Muffin Tin Meal

Muffin Tin Meal!
Kelly and Jake each had their own muffin tin lunch.
I was surprised at how much they ate and
the fact that Jake (17 mos) only tried
to tip his tray once!!For the little man...
hot dog, grapes, banana, cheese,
pirate puffs and cheerios
For Kelly...
hot dog, grapes, cheese,
pirate puffs and yogurt

Recycled Crayons

FUN!
I peeled most of the crayons but had Kelly
do a few tooWe used muffin liners but you don't have to
Break the crayons up into halves or thirds.
We tried a few fun combinations
as well as mixing some primary colors to make
other colors
(red + yellow = orange)
Bake for 8 minutes at 275 degrees

Fun!

Butterfly

Look how cute this butterfly snack idea is!
Basically you choose 2 different types of snacks
(I used grapes and apple slices)
close up the Ziploc and tie a pipe cleaner in the
middle for the butterfly antennas.
Super simple, very cute and the kids love it!

Playdough!

We love to make and play with playdough in our house!
Here is my favorite recipe...there are lots out there
but this is the one I like best:
First mix together your dry ingredients...
flour, salt and cream of tartar

Next, add the water, oil and food coloring.

Mix well until only small lumps remain.

Cook on medium heat stirring constantly.
It will start to lump together.

Continue cooking until little moisture is left.


I usually plop mine onto a cookie sheet to cool
and then knead it.
The playdough on the bottom is right out of the pan.
Once completely cool, store in Ziploc bag or plastic container.


I bought all of my ingredients at Smart & Final.
If you plan on making a lot of playdough, that is
the best place to buy the Cream of Tartar...it is a bit
pricey at the grocery store!

Colored Pasta

There are so many fun things you can do with colored pasta!

Here is what you need to get started...
pasta (preferably with holes to string later), food color,
rubbing alcohol, latex gloves, tray or cookie sheet,
wax paper and
Ziploc bags
First, put pasta into a Ziploc bag. Poor in a tiny amount (3 Tbs or so)
of rubbing alcohol and food coloring. Close up bag and put into
another Ziploc bag. Close the second bag and shake.

The reason for two bags is to save you from a HUGE mess
if the first bag were to open!

Poor out colored pasta onto a cookie sheet covered with
wax paper. Spread pasta around cookie sheet and allow to dry.
(This is where the gloves come in...wear them for this step to
save you hands from getting dyed!)


Nov 10, 2010

Car Painting

Painting with cars...is so much fun! Here is what you need...
paper, a box lid, paint, toy cars

Put a few drops of paint on paper

Let your child explore and have fun!!


If you use cars with textured wheels...you get
fun prints like this!
I am keeping one for Jake's *art box*
and the others I am going to use as
cards for the Grandparents.

It's Raining, It's Pouring!

Kelly did this activity when she was in preschool
and she has been waiting for it to rain so she could
do it again! Color a picture on paper with markers.
Set it outside in the rain and let the colors swirl!